A Brief Pep talk: Continuing the preparation
In part 9, we covered several topics such as Swap Space, Memory, Semaphores, File handles and Hangcheck-timer. A good thing about being familiar with all the components that make Oracle RAC work is that you, as a DBA, become more interested in the technologies involved in it, and that makes learning a fun thing.
Let’s get on to installing the rest of it. We will pick up from where we left in the last article.
- Remote access checks (both rsh,rcp – not recommended and ssh,scp – recommended)
Remote Access : Secure (SSH &SCP) and Non-Secure (RSH & RCP)
There are two ways of doing things–the secure way and the non-secure way. Since version 10g R1, Oracle has included support for SSH and thus instead of using rsh and rcp, you can use ssh and scp; “s” as you guessed stands for secure. The rsh and rcp commands are not required for RAC but for installation and patchset installation to copy files across nodes.
Installation of SSH must be done before you begin Oracle installation.
SSH and SCP way
Ok let’s see how we can install the SSH suite. If you saw my article about the NXMachine then you can guess about the public and private key mechanism. Now SSH (secure shell) must be configured for oracle user on all cluster nodes. OUI uses ssh and scp commands during installation to run (secure) remote commands and (securely) copy files to the other cluster nodes.
Is SSH running on my server? (These are generally disabled by default). Oracle uses OpenSSH version 3 (There is already version 4.3 as of this writing). Now if ssh and scp are not available, it defaults to rsh and rcp. Do configure SSH in such a way that these commands do not prompt for a password.
Do I have my SSH installed?
Do this when logged on as “oracle” userm
$ pgrep sshd

[root@nickrh4 ~]# pgrep sshd

2183

2959
In addition, for the manual do “man sshd” to get enough on that information on SSHD.
Having checked that, we go ahead using ssh-keygen creating both RSA and DSA keys. What does the ssh-keygen do? According to the manual:
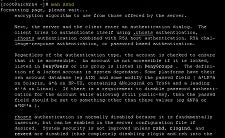
“ssh-keygen generates, manages and converts authentication keys for ssh(1). ssh-keygen can create RSA keys for use by SSH protocol version 1 and RSA or DSA keys for use by SSH protocol version 2. The type of key to be generated is specified with the -t option. If invoked without any arguments, ssh-keygen will generate an RSA key for use in SSH protocol 2 connections. ssh-keygen is also used to generate groups for use in Diffie-Hellman group exchange (DH-GEX).
Creating RSA and DSA keys on each node:
1. You should be logged as the “oracle“ user.
2. Create an .ssh directory in the oracle user’s home (directory) with appropriate permissions:
$ mkdir ~/.ssh

$ chmod 700 ~/.ssh
3. Enter the following commands to generate an RSA key for version 2 of the SSH protocol:
/usr/bin/ssh-keygen -t rsa
Accept the default locations for key file, enter passphrase twice and you are done. This command writes the public key to the ~/.ssh/id_rsa.pub file and the private key to the ~/.ssh/id_rsa file.

4. To generate a DSA key for version 2 of the SSH protocol, do the following:
    5. Carry out similar activities, like accepting defaults

and your unique password.
Never distribute the private key to anyone! (If you deal with security, you know this is the best way to get all wet and naked for a hacker!)
~Edit the authorized_keys on every node. For instance, if you have 4 nodes your authorized_keys file (located in /.ssh/ ) will have eight entries. If you do not have “authorized_keys”, doing this will create it:
$ touch ~/.ssh/authorized_keys

$ cd ~/.ssh

$ ls

[root@nickrh4 .ssh]# ls

authorized_keys  id_dsa  id_dsa.pub id_rsa  id_rsa.pub
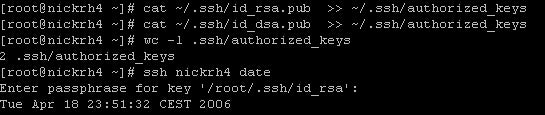
~Do a cat for local and remote keys :
ssh nick01rh4  cat /home/oracle/.ssh/id_rsa.pub >> authorized_keys

ssh nick01rh4  cat /home/oracle/.ssh/id_dsa.pub >> authorized_keys

ssh nick02rh4  cat /home/oracle/.ssh/id_rsa.pub >> authorized_keys

ssh nick02rh4  cat /home/oracle/.ssh/id_dsa.pub >> authorized_keys

ssh brian03rh4 cat /home/oracle/.ssh/id_rsa.pub >> authorized_keys

ssh brian03rh4 cat /home/oracle/.ssh/id_dsa.pub >> authorized_keys

ssh brian04rh4 cat /home/oracle/.ssh/id_rsa.pub >> authorized_keys

ssh brian04rh4 cat /home/oracle/.ssh/id_dsa.pub >> authorized_keys
~Do a word count per node, they all must have 8 lines:
wc –l authorized_keys

8 authorized_keys
~Copy the keys across nodes using scp protocol:
scp authorized_keys nick02rh4:/home/oracle/.ssh/

scp authorized_keys brian01rh4:/home/oracle/.ssh/

scp authorized_keys brian02rh4:/home/oracle/.ssh/
This should go seamlessly, without issuing passwords. You will be prompted to edit your oracle user password if you didn’t do the cat. If you did the cat for local and remote keys, you get to enter the passphrase once. The moment the nodes establish the SSH protocol, they know of each other’s private keys that unlock the public keys (so to speak):
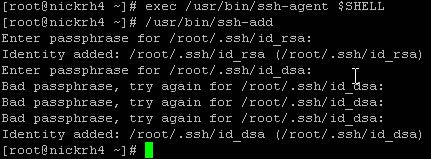
~Setting up Oracle user equivalence: (I forgot the dsa passphrase for a while).
~ Testing your Oracle user equivalence by doing this on all nodes:
ssh

nick01rh4 date

ssh nick02rh4 date

ssh brian03rh4 date

ssh brian04rh4 date
This should now go seamlessly.
In order to ensure that X11 forwarding will not hinder the installation process , create a user-level SSH client configuration file for the Oracle software owner user, as follows: Using gedit for instance, edit or create the ~oracle/.ssh/config file. Make sure that the ForwardX11 attribute is set to no. For instance:
a. Host *

b. ForwardX11 no
Remember that OUI must run from this same session or remember to repeat the steps when running OUI from another terminal.
$ exec /usr/bin/ssh-agent $SHELL

$ /usr/bin/ssh-add
RSH and RCP method
To learn more about RSH and RCP see this. It is important to note is that both SSH and RSH build trust among nodes using host equivalency.
~Check for the binaries:
[root@nickrh4 ~]# rpm -q rsh rsh-server

#rsh-0.17-25.3

#rsh-server-0.17-25.3
~If not ,install them (or yum it):
su –

#rpm –ivh rsh*
~Edit the “disable” attribute in the /etc/xinetd.d/rsh file to set it to “no” and xinetd must be reloaded. Do this on ALL NODES:
su

#chkconfig rsh on

#chkconfig rlogin on

#service xinted reload
~Create hosts equiv files on all nodes for host equivalency (in order to establish trust among the nodes) as /etc/hosts.equiv file on all cluster nodes by doing:
#su –

#touch /etc/hosts.equiv

#chmod 600 /etc/hosts.equiv

#chown root:root /etc/hosts.equiv
Edit the file:
# cat /etc/hosts.equiv

+nick01rh4 oracle

+nick02rh4 oracle

+brian01rh4 oracle

+brian02rh4 oracle

+nick01rh4-priv oracle

+nick02rh4-priv oracle

+brian01rh4-priv oracle

+brian02rh4-priv oracle
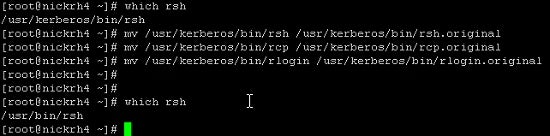
Do I have the correct version of RSH?
We do not want Kerberos rsh so we do the following:
~Run the following command from the node from where you will be doing the installation:
su – oracle

$ rsh nick01rh4 ls -l /etc/hosts.equiv

$ rsh nick01rh4-priv ls -l /etc/hosts.equiv

$ rsh nick02rh4 ls -l /etc/hosts.equiv

$ rsh nick02rh4-priv ls -l /etc/hosts.equiv

$ rsh brian01rh4 ls -l /etc/hosts.equiv

$ rsh brian01rh4-priv ls -l /etc/hosts.equiv

$ rsh brian02rh4 ls -l /etc/hosts.equiv

$ rsh brian02rh4-priv ls -l /etc/hosts.equiv
Conclusion:
Well you can never say enough about security and get away with it. Securing your Oracle database is like securing your house. You would not want anything to go wrong with it. The private and public keys infrastructure helps us secure our traffic. OpenSSH is a major player and almost every big application has it running. Amazingly enough, it is open source (meaning free)! In our next article, we will continue with our preparations. I will write more on OpenSSH and Oracle on my Oracle Blog.